As a busy blogging, home schooling mom and wife, life rarely slows down around here. If you are like me, you are constantly looking for ways to spend less time doing the job. If you are looking for some extra time-saving, money-saving practical tips then you’ll want to visit every Tuesday where I have partnered with Good Deal Mama, Jessica’s Coupons, and Rose Knows Coupons (AKA: The Tipsters!) to share our own individual tips that will either help you save time or money, or hopefully even both!
Today’s tip is brought to you by Rose!
Do you run to the salon the minute your eyebrows start to grow out? It’s costly isn’t it! If you wax your eyebrows once a month and pay $10 – $15 each time you go, you are spending upwards of $180 per year on something you could be taking care of at home for less than $20 for the entire year!
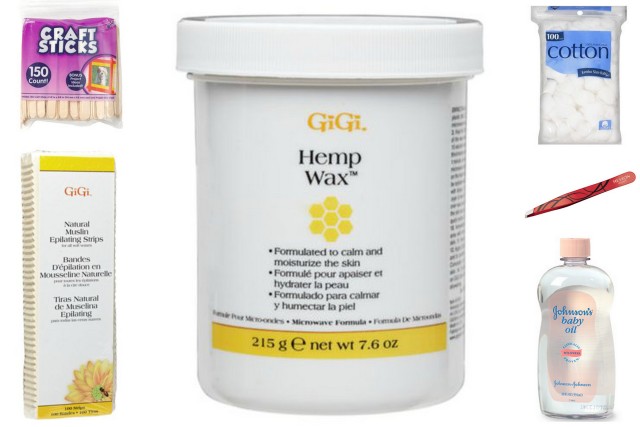
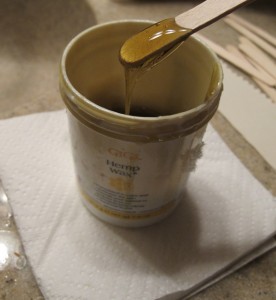
These are the products I use to wax my eyebrows at home:
- GiGi Hemp Wax $10.99 at Sally Beauty Supply (This will last you all year..maybe longer!)
- GiGi Muslin Strips $6.99 (This will also last you a very long time! Just cut to size!)
- Craft sticks found at Walmart or any craft store (aka popsicle sticks)
- Baby oil & cotton balls (To remove leftover wax)
- Tweezers (For the strays)
Simple Steps To Waxing Your Eyebrows At Home
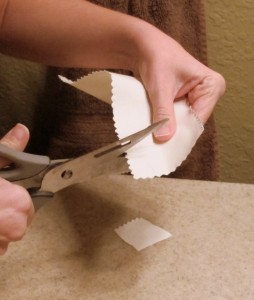
Step #1: Make sure you have all of your supplies ready. Once the wax heats up, you don’t want to be running around looking for the necessary tools to do the task. This includes cutting the strips to size. A good size is about 1 inch. You will want to be prepared with extra strips.
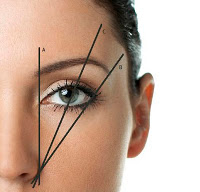
Step #2: Refer to the guide above. You never want to wax too far in from the natural start of your eyebrow (line A) and you never want to wax too much making your eyebrow line too short (line B).
Step #3: Heat the wax according to directions on container. It’s helpful if you heat it in spurts rather than all at once. Kind of like when melting chocolate in the microwave. Heat, stir, repeat. The wax should run off the popsicle stick slowly and smoothly. If it’s too drippy, let it sit for a few moment to cool off. You can always test it on the back of your hand.
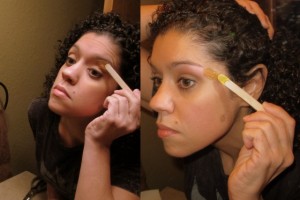
Step #4: Apply the wax with the popsicle stick to the area where you want the hair removed. The slower you apply the wax the better. I find it easiest if my face is right up to the mirror. If you end up getting wax in areas you don’t want removed, just peel it off with your finger or use a baby oil soaked cotton ball.
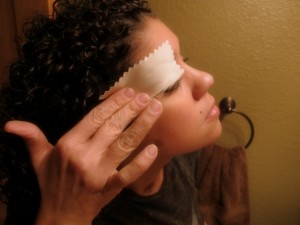
Step #5: Apply the muslin strip and smooth your fingers over the waxed area assuring that the wax is adhering to the strip. I usually rub the area back and forth a few times.
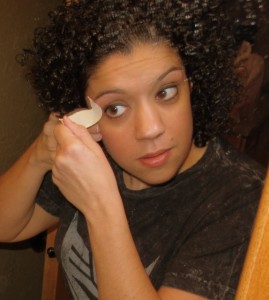
Step #6: When you are ready to remove the muslin strip, grab a hold of the end, and quickly yank in the opposite direction of the hair growth. If you have leftover wax still on your skin, you can just find a clean area on the strip, or use a new strip, press down on the wax and quickly pull away.
Step #7: Once you are done with the bigger areas, you will most likely have some “clean-up” to do. I personally would not wax over the same spot more than twice. You risk the chance of damaging the skin. For the strays left over, use a tweezer. To remove the leftover wax, soak a cotton ball with baby oil and rub the skin gently. Be sure to wash the area with a a mild face soap when you are done and condition the skin with a light moisturizer. You will most likely be red (and possibly sore at first) for awhile. This should go away within a half hour or so.
*Disclaimer: I am not a licensed Esthetician. This post is simply sharing with you how I taught myself to do this at home which has saved me money every month. Please read all package directions thoroughly before starting.
Do you have a tip you want to share with The Tipsters? If so, you can contact me via email HERE! Your tip could be chosen and featured on Tuesday’s Tips! Don’t forget to share this post on Pinterest by clicking the Pinterest icon (red P) at the bottom of this post!



Leave a Reply